Tuesday 28 May 2013

Leftovers - Gerrano Breads

Allow me to introduce you to the Gerrano Bread
 I did mention in "Mediteranean Flat Bread" that I would do a post on these wonderful, little breads. They are one the best ever ways of using leftovers and turning them into something so delicious, you have just got to try them.
 I first saw them made by Jamie Oliver on the same Happy Days tour that I mentioned in both my curry and pizza posts and have not forgotten it since. He had made a pizza and so he then wrapped all of the surplus toppings in this leftover dough. This dough ball was then stuffed in a terracota plant pot and left to rise. As the concert went on, the bread rose...and rose and then at the end of the concert, he suddenly remembered that it was cooking and so, after all that, he burned it! 
Try cooking it in a floured pot...
 Anyway, it seems such a terrible shame to waste any surplus dough when making pizzas so a gerrano bread is the perfect way to make sure that nothing gets binned that doesn't need to be. It also avoids you chucking stuff out from your fridge that you don't have any idea what to do with: hams, cheeses, tomatoes, etc so they're just brilliant! A terracotta pot isn't mandatory but they sure do make for a real groovy bread. Just flour a flat tray of some sort, it does the job just as well.

 Time: 5 mins prep, 1 hour rising, around 25 mins cooking

 Serves: Yourself!

 RECIPE:

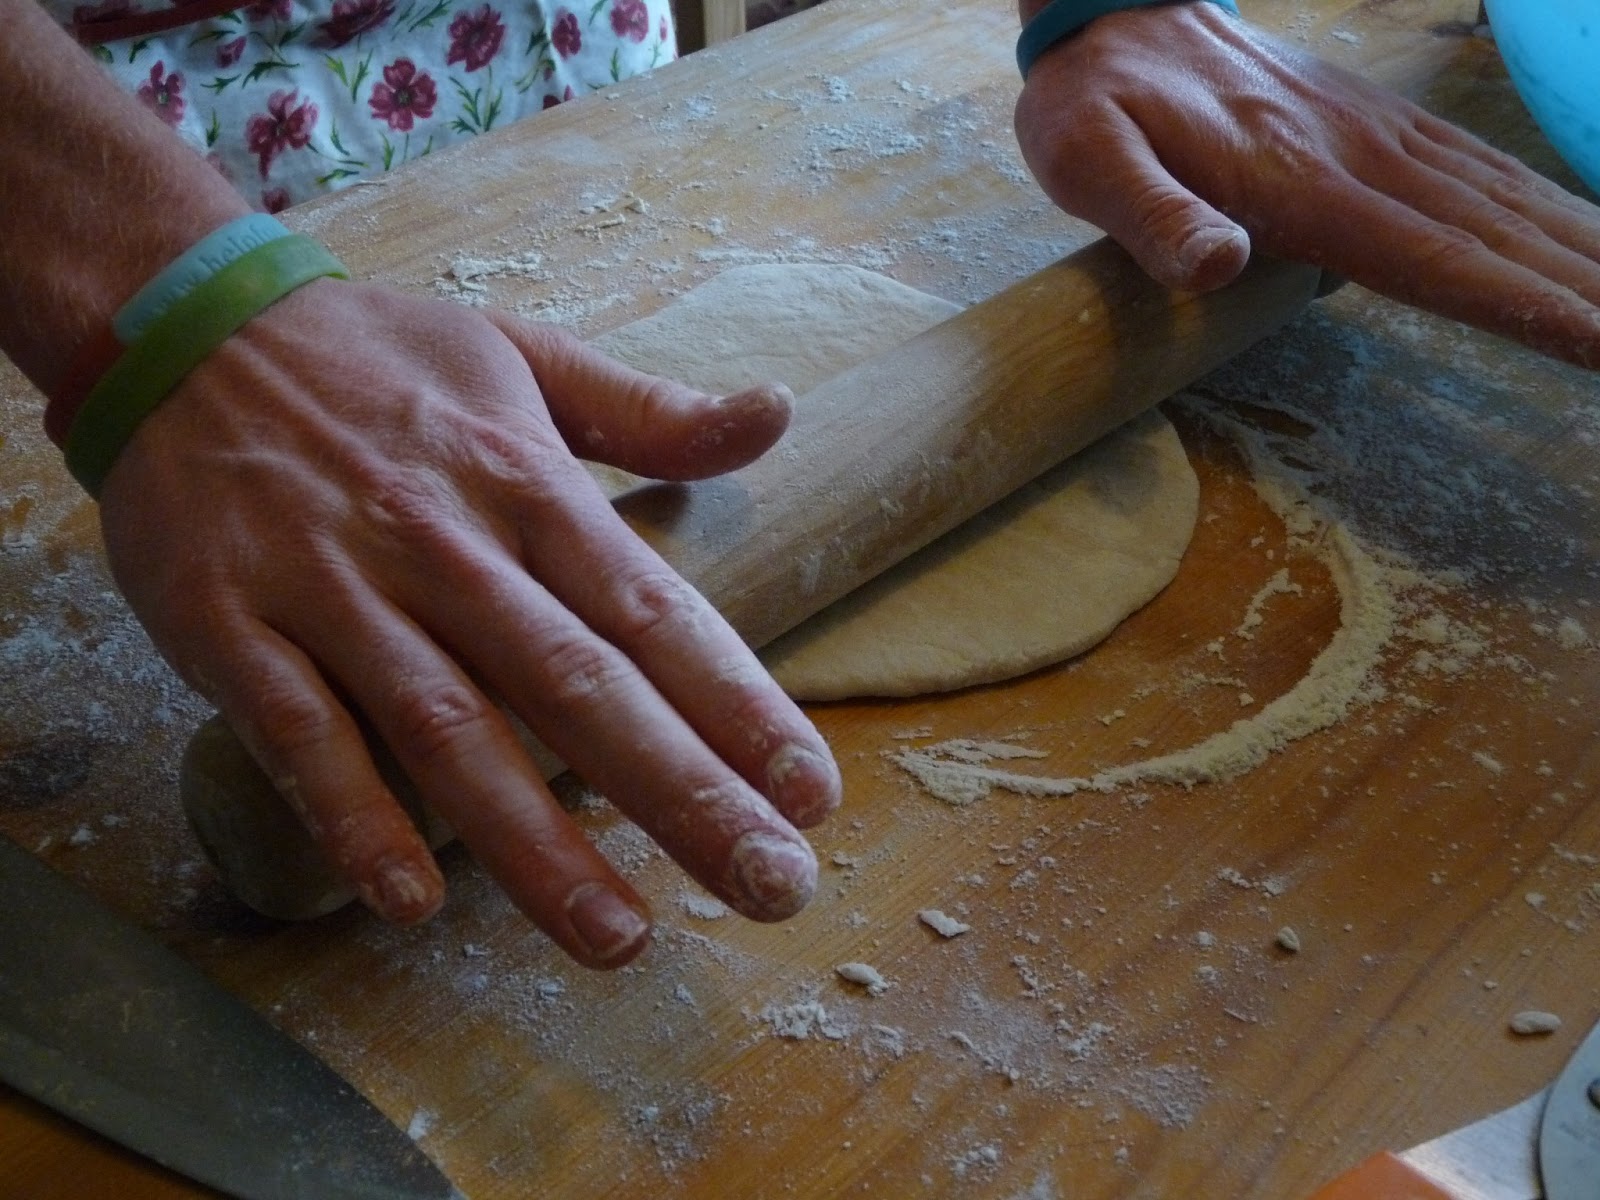
Don't roll it too thin...
Lidl's Combino tomato sauce
 1) Flour your surface, hands and rolling pin and roll out your leftover dough but not too thinly. Smear with some tomato sauce (Combino from Lidl works a treat but leftover bolognese makes for a delicious bread too), sprinkle with some grated cheese or tear up mozzerella and ham, chicken, bell peppers, diced red onion, sliced chillies, whatever "floats your teapot" or was it "rocks your float"...I can't remember. I like a little sweetcorn in mine sometimes but that's me and I can be a tad strange.
 2) Once you have all the fillings that you desire, wrap up your dough carefully, pinch it together and flip it upside down onto a floured tray. Drizzle with a little olive oil and let it rise for an hour or so.
What's good in the fridge?
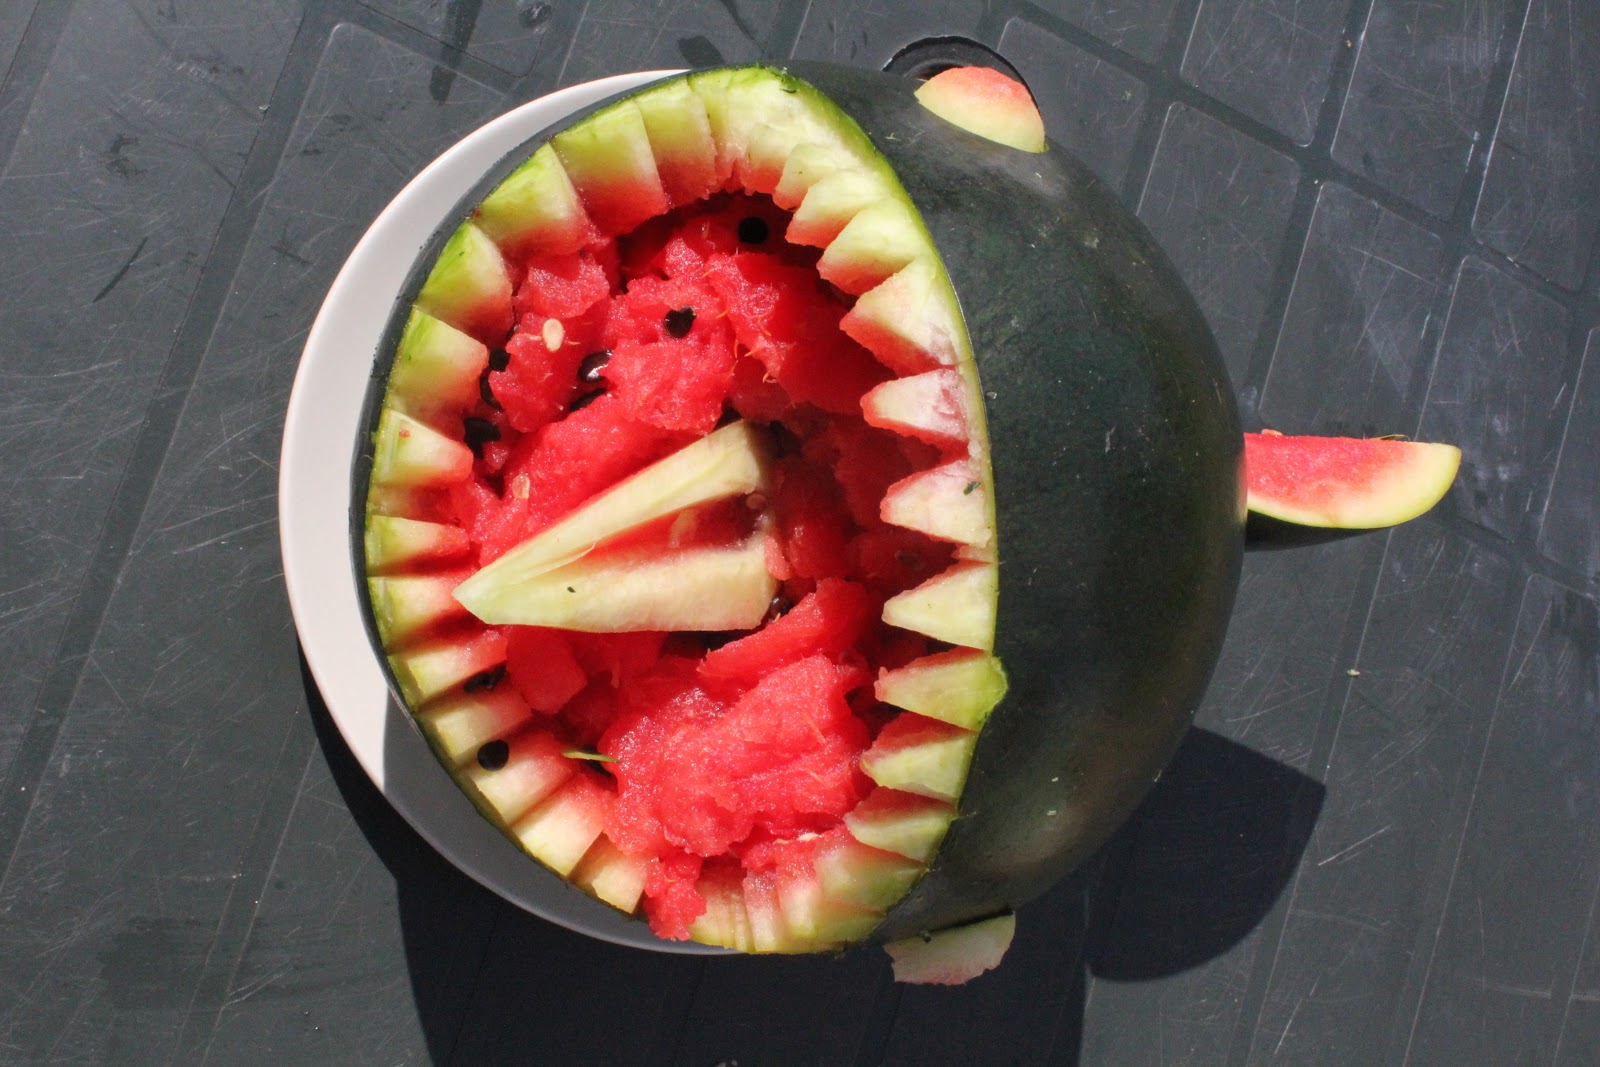
Kinda cute isn't it?
 3) Preheat your oven to 200 degrees or so and cook your bread until it starts going a little golden. It should take no more than half an hour so keep an eye on it. When it's cooked, let it cool a little and then place it on a rack for a bit before cutting it open and tucking in!


 You can eat it hot or take it to work, on a picnic, as I said, whatever takes your fancy. Have a go yourself everyone, the results are most rewarding. Waste not, want not! I have not tried this but what about a left over curry or chill con carne gennaro bread?

 Seasoned with Thriftiness,

 Jacob

Fold it together...
...and pinch it shut


Yes, my apron has ducks and frogs on it


"To glorify my Savior, Jesus Christ, the Creator  
of the universe and spread further abroad His glorious gospel." - Yours Truly

Friday 24 May 2013

Watermelon Carving

My first attempt.


 Now, you may have seen a glassblower tinkering away, perhaps a carpenter making a chess piece pepper grinder or even an ice sculptor at work but you can't eat such artwork. So let me introduce you to fruit carving! I had never heard of it until I saw a video slide show on YouTube earlier last year of these amazing Asian chefs creating some phenomenal table displays with these absolutely mind-boggling 3D designs carved into the sides of these huge hunks of fruit. I was blown away! There they were with needle-like knives, bent over with such intent faces of concentration, slowly but surely carving out the most intricate of designs. Much like these...
 OK, confession time: I can be very competitive by nature. So, as I watched a few more videos I began to think, "You know what? That doesn't look that difficult..." Within the next few days, I was in the fruit section of Lidl with a huge watermelon in the trolley.
Not mine as yet but the possibilities are just endless...
 A few things to consider before you start. You will need a good, fresh watermelon. When carving a watermelon you are working with four colours: The dark green outer peel, the lighter green just after that, the white flesh and the red flesh. If your watermelon is fresh then these four colours are much more distinguished. The knives that you will see the professionals use are so much easier if you are wanting to go really detailed but you will mostly get away with a regular paring knife. You will often also need a melon baller and  what's known as a "lazy susan" or a "dumb waiter".
You'll find that the professionals
will use knives similar to these.
Not a whole lot of skill required but
it's still among my favourites.
It's cute and kid's will love it!
 Above, you will see that I went for a surface design of roses. Surface designs can often be much more precision based and rather tricky but you can do something shell based such as a pram full of balled melon and other fruits, a peacock which can look most regal, or this rather cute turtle to the right. It's up to you and how adventurous you feel at the time. Below is a shark's head which I enjoyed doing.
 There are a bazillion tutorials on YouTube so get on the net and keep your eye out for a design you like the look of.


I did this outside for a few kids at a birthday party.  It took only a few minutes but the crowd loves it!
"I don't bite, mate. Honest..."

As you can see, this is the wrong knife and I am holding it
precariously by the blade!  Don't try this at home. Wait for the right tools.
Watermelon carving demands a steady hand!
Keeping an eye on all the blades...

Entertaining the crowd!


"To glorify my Savior, Jesus Christ, the Creator  
of the universe and spread further abroad His glorious gospel." - Yours Truly

Monday 20 May 2013

A Delicious Glazed Lemon Tart

As you can see, I managed to over cook the pastry but it
sure was good.
 Are you after something that can deliver an amazing look and incredible flavour? Well, then this is for you. Tangy lemons, sweet vanilla, subtle pine nut and soft pastry makes for an awesome response from anyone you serve this to. Since I had learned how to make that magical sweet pastry, (see 'Work Experience - Part 1') I decided to make use of it. My Mum has some of those Farmhouse Cookery books so I consulted one and came across a recipe that caught my eye: Glazed Lemon Tart. Plenty happened that might have made this an utter disaster such as not baking the pastry case 'blind' so that nearly put a spanner in the works but somehow it came out okay. 
 Before you start this recipe, you must first slice two lemons, removing all the pips, and place the slices in a bowl of boiling water. Leave them to soak for eight hours, drain then put the slices in a saucepan of cold water. Bring this water to the boil, lower the heat and then cover with a lid. Simmer gently for an hour until the slices are soft. Remove from the heat and then let them cool in the liquid. Now you are ready to begin!

Often these old cookery books are brilliant. The recipes are tried and true,
tested by time. Keep your eye out in the book section of Charity shops.
 Time: 1 hr 45mins plus 25 mins

 Serves: 6

 RECIPE:

 1) Take 4 oz of my sweet pastry and gently roll it out on a lightly floured surface until it is a circle about nine inches across. Line a 7-8 inch flan tin with the pastry, prick it and bake it blind* for five minutes while you prepare the filing.
 2) Take three bowls. In the first, mix a tablespoon of plain flour with 2 oz of pine nuts. In the second, beat 2 oz each of caster sugar and butter until soft. In the third, beat an egg with the rind of one lemon. Now add the egg mixture to the sugar and butter before combining the flour and nuts. Spread this mixture over the baked pastry case and bake at around 180 degrees for 25 minutes or until the tart has risen and is golden brown. Remove and allow it to cool.
 3) Drain all but a half a pint of the lemon water and then pour that into a saucepan with one vanilla pod and 8 oz of caster sugar. Cook over a low heat until the sugar dissolves before plopping in your lemon slices. Simmer for about five minutes and then carefully lift the soft lemon slices on to a plate. Continue to boil the syrup rapidly until the mixture sets when cool. (Test with a spoon on a saucer.) Arrange the lemon slices in a circular pattern over the tart. When the syrup is setting, take it off the heat and remove the vanilla pod and, as soon as the bubbles have subsided, spoon all the syrup over the lemon slices. Leave the whole thing to chill in the fridge and then serve cold in wedges. Da, da!

 This tart was just gorgeous. After a rich main course, the taste buds would certainly welcome its fresh zing. Give it a go and let me know how you find it!

 Seasoned with Enthusiasm,

 Jacob


"To glorify my Savior, Jesus Christ, the Creator  
of the universe and spread further abroad His glorious gospel." - Yours Truly

Friday 17 May 2013

A Few Thoughts on Barbecued Food

If you are vegetarian then this post is probably not for you...
Wow, at last BBQ season can finally begin! I absolutely love a good cookout with family and friends, football and the barrage of intoxicating smells and tastes of the grill. Some of the best ever barbeques I've ever had were in the States and if you have also been then I'm sure you will agree. Everything is bigger over there and that includes the meat portions!
Would you have guessed
that Shropshire Blue is made
 in Scotland?
 Over time, I've learned that it is often the little things that can make a cook out special. Marinade your meat (send me an email or comment below if you want some recipes) or use some blue cheese for example. Grated blue cheese and mushrooms on a steak just before taking it off the grill is one of the most delicious ideas for a BBQ and I highly recommend anybody trying that. I don't even like blue cheese that much but when used with other flavours in that way, it really is something else. For the ladies, apparently grilled bell peppers on skewers can be the highlight but I would tend to disagree... Also, make your own buns. Seriously, it might sound like it isn't worth the hassle but it really isn't difficult or time consuming. Lightly brush them with single cream and sprinkle on some sesame seeds before cooking and you are away. (Use the bread recipe in the posts  'Authentic As You Like Pizza' or even 'Mediteranean Flat Bread' for some really interesting burger buns.)
This also makes me laugh.
Creature Comforts, "We need the
fresh meat..."
Put a delicious spin on your cheese burger
 My Dad is a keen griller and so I've learned a few things over time from him. One of the things that he will forever stress is that fish does not belong on the grill (however the ladies disagree) and I agree to a certain extent with both parties though sometimes there are a few exceptions either way. Other things like never flipping burgers/patties to the side but rather front to back. This way you never lose a burger through the grill which always was a problem for me...
 Now, I can remember the first BBQ that I did by myself and it was for my 13th birthday - I was the man! Can anyone else explain to me why standing in front of a grill full of meat over coals gives a guy that amazing sense of fulfilment? I've seen half a dozen grown men gathered around one BBQ watching another guy turn sausages! What is up with that? Is it some kind of natural instinct within a man to want to prepare and cook meat for his family? You tell me.
 If you are interested in some brilliant videos on BBQ food then click on the links at the bottom of this post.

...dodgy apron! 
And yet another...


 Seasoned with Jollity,

 Jacob


"To glorify my Savior, Jesus Christ, the Creator  
of the universe and spread further abroad His glorious gospel." - Yours Truly

Tuesday 14 May 2013

Chocolate and Elderflower Truffles

Jamie's deadly chocolate truffles
 More chocolate! If you haven't guessed already, I live with a few sweet-tooths. I saw a cheat recipe for a chocolate ganache intended for truffles just the other day and, as you may know, I love a good cheat so it was off to the kitchen!

 Interesting Fact - Truffles were originally made in France and gain their name from the Latin word tuber meaning 'lump' or 'swelling'. This is how they share their name with the highly famed variety of fungus used in haute cuisine as they share the same root word.

 Time: 10 mins exc. setting time

 Serves: Makes enough for aprox. 24 large truffles

 RECIPE:

Champagne anyone?
 1) Line a small dish with clingfilm and heat 300ml of double cream in a small saucepan until bubbling. While it heats, cut up or smash up 450g dark and milk chocolate of an even ratio and place a mixing bowl. Pour over half the bubbling cream and allow the chocolate to melt for about a minute. Use an electric whisk or a mixer to combine the chocolate and cream and then you can add your flavours. Once you have added your desired flavours, you add the remaining cream and mix again as adding the cream in two parts stops the mixture from splitting. Pour into your prepared dish and fridge it preferably overnight. 
In goes the hot cream...
 2) Evenly divide your truffle filling (see tip below) and then plunge your hands into a large bucket of ice-cubes. (Just joking. Run them under cold water.) With your cold hands, roll into balls and coat in cocoa powder but be quick so that they don't start melting. Place into miniature cup-cake papers and watch your friends and family go crazy!

 (Click here to see how to temper chocolate to take your truffle's to the next level on my friend, Jodi's, brand-new blog, Bittersweet Curious Coffe.)


A Spoonula can be indispensable. Be sure to
look at 'Tools For The Job - Part 3'
 Wanna-be-chef's Tip - Pour some boiling water into a mug and dip a knife into the water. Dry your knife and cut away. (You may need to repeat this process a few times to avoid your filling sticking to your knife.)

Chocolate and orange for me! It's
a shame that's just a picture...
 This is your chance to personalise your truffles. Go with three tbsps of a liqueur such as Amaretto, Cointreau, Tia Maria, Baileys, a Champagne or Rum perhaps or maybe a sparkling elderflower with a teaspoon of vanilla extract which I used. Use different chocolates and roll your truffles in something else like finely chopped, sugared almonds if using Amaretto perhaps. Whatever happens, there are a bazillion different combinations out there for you to try so go have an explore. Be sure to tell me how yours come out and send some pictures. Write to onedeliciousman@gmail.com today!
And what the Spoonula leaves...

 Seasoned with Indulgence,

 Jacob

P.S. If chocolate is your thing then click here for my Chocolate and Orange Mousse recipe.


"To glorify my Savior, Jesus Christ, the Creator  

of the universe and spread further abroad His glorious gospel." - Yours Truly

Saturday 11 May 2013

A Slight Confusion...

Shame, I wanted to take my top hat...
Click here for more wedding pics
 Unfortunately, my most recent post which I uploaded yesterday, the 10th of May, has unexplainably decided to hide itself and so does not appear as the new post. You will find 'Sour Dough and the Science' of Food under the month of March this year in my 'Archives' down the right-hand side of the main page. I apologise for this confusion, I fully intend to sort the problem as soon as possible. Thank you so much for your patience.

 God bless you all,

 Jacob


"To glorify my Savior, Jesus Christ, the Creator  
of the universe and spread further abroad His glorious gospel." - Yours Truly

Tuesday 7 May 2013

Work Experience - Part 2

You can't go wrong with this. Tomatoes, parmesan and/or mozzarella,
basil, red onion, a pinch of salt and pepper and olive oil.
 I did return a few times to the kitchen at that small hotel. I learnt more and more each time I went. The chef once gave me tomatoes, mozzarella, red onion and basil leaves and said to see what I could do with it. He seemed pleased with I did and it all went when served so I think it worked! Just small things like that were a good challenge for me and make you think differently because it can be difficult to make something out of seemingly nothing. Other times there was a lot to work with! Like when we prepared a ton of ribs in a Chinese style rub which introduced me to Terryaki. There I was up to my elbows massaging this rub into literally hundreds of these ribs in a huge tray. Great fun!
The chef challenged me
with a "guess the smell".
I had no idea this existed!
 As you can imagine, the kitchen can be a dangerous place. You usually sustain injuries from another person's carelessness (like Jamie Oliver who picked up a towel to dry his hands not knowing that the towel had been used to clear up broken glass) or things that you least expect to be harmful. For instance, I had placed a hot tray from the oven on our steel table earlier but it had been removed. I leaned on it a moment later with my hands to find that it was hot enough to cook on itself! Yeah, sore... Later on, I burnt my finger pads when about to lift a saucepan off of its hob but the handle had been over the gas next to it so the Burn-Eaz had to come out. Save those incidents I came out unscathed.
His device was like this but bigger
 There were some great tools in this kitchen and all of the best quality. Some were a complete bizzareity too. (My new favourite word.) We had good fun with a potato peeling race that he won (by a whisker!) before boiling them. When it came to mashing them he used a machine that's even better than mine! (See previous post 'Tools for the Job - Part 3') It was a huge food mill which he stuck on top of his even bigger saucepan and that made the perfect mash.
 One of my favourite things that I got to make while there was carrot cake. Simple enough and not necessarily that pretty but this sure delivered on taste! It seriously was delicious and all those who sampled it later seemed to agree too. I learnt how to make cream-cheese icing/frosting and how to apply it properly. The end result looked awesome and I was super proud of it, however, I had to rescue it somewhat after I discovered, to my horror, a little finger hole in the icing. To this day I know not whom the culprit was but my guess is that they were under four feet and possessed a most mischievous grin...
Everyone should have a go at this but ensure your
environment is safe beforehand
 It was I who caused a few blunders also. I was given charge of making a huge bowl of cous-cous but neglected to 'fluff' after adding the stock and so it became a semi-sphere of yellowed concrete. I nearly did it again only a few days ago but I wasn't going to make that mistake twice!
 The last day that I worked there I learned something super cool: flambe! (Needs a little acute accent over the 'e'.) Boy is that fun! We were preparing some chicken for a pie and some for skewering later so while I was 'sealing' all of the meat in very large pan I got to have a go at it but, as you have probably guessed, it can be hazardous. The chef I was working with at the time leaned over for something just as my pan went 'boom' but chefs, however, posses good reflexes so injury was avoided. Otherwise, that could have taken a potentially disastrous turn...
Making a salad at home
 So, among a whole host of other things such as working with asparagus for the first time, making hundreds of sandwiches, scores of cookies and Ben and Jerry's Pecan and Maple Syrup ice-cream, that kind of gives you an idea of what I got up to.

 Seasoned with Ductility,

 Jacob

 P.S. Be sure to read my "Tools For The Job" series and "Work Experience - Part 1"


"To glorify my Savior, Jesus Christ, the Creator  
of the universe and spread further abroad His glorious gospel." - Yours Truly

Sunday 5 May 2013

Marmite - "Love it or hate it..."

Why not write and tell me?
 Personally, I love this black, jarred goo but that might have a lot to do with the fact that it was one of my Mum's cravings when she was pregnant with me. I would have it on hot, buttered toast any time of day. Whenever I've done a long car journey where leaving before breakfast is necessary, it would always be Marmite sandwiches made the day before and fridged over night. The butter and Marmite almost combine for a peculiarly delicious, alternate breakfast. You may be thinking, "This is strange coming from someone who aspires to be a chef," but I've had those ever since I can remember and still love it today.
It isn't as bad as might think...
 If you are unfamiliar with this wonderful spread, Marmite was first created by Justus von Liebig in the 19th century originally made from concentrated, brewer's yeast. It derives its name from a french word for a large, lidded pot which is still featured today on all Marmite labels. With the first batches being made in 1902, it took only until 1907 for need of another factory. The Marmite fever was spreading... (Ignore the pun.)
 There are other products similar to Marmite such as Bovril which I also like very much. Both Bovril and Marmite can be used to make hot drinks (which you may associate with cold football games) and a teaspoon or two works a treat in soups, stews, casseroles, etc. If you live in Australia then you will probably be more familiar with another one of Marmite's cousins, Vegemite though I can't say I've tried that as yet and apparently it is decidedly different from Marmite.

Definitely better out of a jar
 Marmite's flavour is certainly an acquired taste. A friend of the family, who is Indian, enjoys very, very hot food, however, my Dad offered him a small amount of Marmite on a teaspoon. Amusingly enough, he found Marmite to be completely unpalatable yet my youngest siblings enjoy its indescribable flavour immensely.
This made me smile!
 A few years ago, my Mum gave me the challenge of writing a description of what Marmite tastes like and a challenge it was. I would like to give all you guys the same challenge and see what we come up with. Due to its seemingly controversial nature, I would also love to hear your opinions as I am sure they are many and diverse. Comment below and send your thoughts to onedeliciousman@gmail.com right now!


 Helpful Hint - Do you get frustrated sometimes with how difficult it can be to spread it on your toast? After a while, we developed a method so that it doens't end up all over your fingers and drizzling over your worktops: spin it around your knife before spreading... 


"To glorify my Savior, Jesus Christ, the Creator 
of the universe and spread further abroad His glorious gospel." - Yours Truly